Azure Course Labs
App Service CI/CD
Continuous Integration and Continuous Deployment are supported with two features of Azure App Service - deployments which can be triggered every time source code is changed and pushed to a Git repo; and deployment slots which let you deploy to a staging environment and test it before you send the new version to production.
In this lab we’ll set up CI/CD for the random number API, deploying it from your own GitHub repo so you can push changes.
Reference
App Service Deployment from GitHub
You should have your own fork of the lab repo in GitHub (we covered that in the static web apps lab). If not you can sign up for a free GitHub account and create a fork.
Then add the fork as a remote:
git remote add fork <github-fork-url>
If you already have a fork which is out of sync, you can just delete it and create another one
📋 Create a Resource Group and a Linux App Service Plan with 2 workers. You’ll need to use a Standard SKU to get the CI/CD features.
Not sure how?</summary>
Nothing much new here:
az group create -n labs-appservice-cicd --tags courselabs=azure

az appservice plan create -g labs-appservice-cicd -n app-plan-01 --is-linux --sku S1 --number-of-workers 2
</details>
Browse to GitHub and find the URL for your fork. You can open courselabs/azure and expand the Forks button to find a link to your own fork:
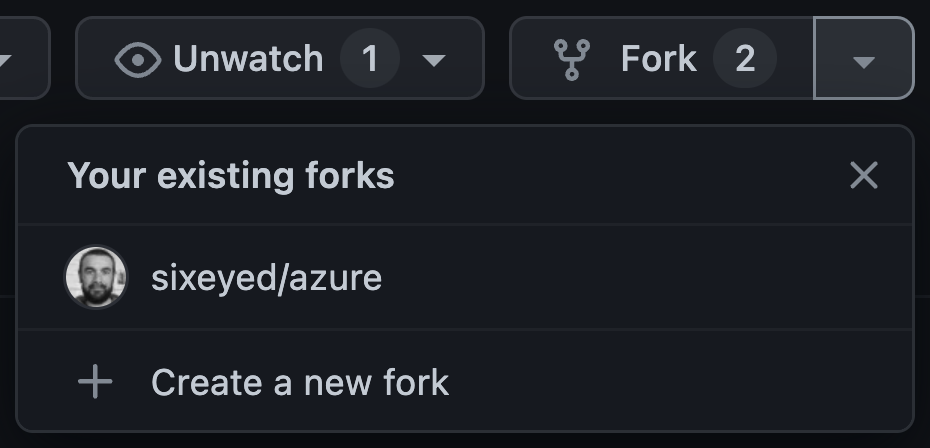
Mine is https://github.com/sixeyed/azure - yours will contain your GitHub username
Create a web app and configure the deployment settings:
# create the app:
az webapp create -g labs-appservice-cicd --plan app-plan-01 --runtime dotnetcore:6.0 -n <dns-name>

# set the path we will be deploying from:
az webapp config appsettings set --settings PROJECT='src/rng/Numbers.Api/Numbers.Api.csproj' -g labs-appservice-cicd -n <dns-name>
We could have used webapp up and that would deploy from the code on the local machine; instead we’ve created the web app and set the path to the project in a config setting
The app isn’t deployed yet - you can browse to the App Service URL and you’ll see the page saying it’s waiting to deploy.
Create the first manual deployment - your GitHub repo is public, so Azure can fetch it without authentication:
# be sure to add the .git suffix to your repo URL:
az webapp deployment source config -g labs-appservice-cicd --manual-integration --branch main -n <dns-name> --repo-url <github-fork-url>.git
Open the App Service in the Portal and check the status in the Deployment center tab. The Settings tab shows your GitHub config and the Logs tab shows the current deployment status.
This first deployment will take a few minutes. When it’s done, check your API is working with curl:
curl https://<app-fqdn>/rng
This deployment isn’t configured to fail so you can keep calling it to get new numbers.
Update the configuration settings in src/rng/Numbers.Api/appsettings.json to change the range for the random numbers.
- set the minimum to 1000
- and the maximum to 10000
You can do this directly on GitHub by browsing to the file, editing it and saving your changes. Or make the change on your local machine and then commit and push:
git add src/rng/Numbers.Api/appsettings.json

git commit -m 'Change RNG range'

git push labs-appservice-cicd
Check the Deployment Center in the Portal - you’ll see there’s no new deployment even though the source repo has changed. We’re using manual integration at the moment, so we have to kick off each deployment. Click Sync to trigger an update to the latest code.
When the deployment completes you can repeat your curl command and the random numbers will be much bigger:
curl https://<app-fqdn>/rng
Configure CI/CD
Continuous Integration (CI) removes the manual step of triggering the build - every time a change is pushed to GitHub, that is the trigger for a new deployment. We’ll switch to CI next.
Azure needs to connect with GitHub for CI, so we will need to set up authentication. Azure will use a GitHub token (Personal Access Token or PAT) to authenticate:
- browse to hhttps://github.com/settings/tokens/new
- you may need to sign in again if you’re using MFA
- enter a note so you remember what the PAT is for
- select the
workflow and admin:repo_hook permissions
- click Generate Token and copy the token (this is your only chance to see it…)
Your token will be a random string prefixed with ghp_ - something like this: ghp_asd3YWHHefefgd2vZgege878AAH
Delete the manual deployment source and replace it with continuous deployment using your GitHub token:
az webapp deployment source delete -g labs-appservice-cicd -n <dns-name>

az webapp deployment source config -g labs-appservice-cicd --branch main -n <dns-name> --repo-url <github-fork-url>.git --git-token <github-token>
Sometimes the command seems to get stuck - if it doesn’t return within a few minutes, cancel it with Ctrl-C and then run the exact same command again.
Check the Deployment Center and in the Settings tab you’ll see your GitHub username. When the deployment completes it will using the latest commit, which is for the larger random number range.
You can change the settings again and push to GitHub - now a deployment will be automatically triggered.
Add a Staging Deployment Slot
Deployment slots let you have your CI/CD publishing new releases to a temporary (“staging”) enviornment - with a different URL from your production slot. That lets you test the new release before you put it live.
Create a slot called staging and configure the deployment for that slot:
az webapp deployment slot create --slot staging -g labs-appservice-cicd -n <dns-name>

az webapp config appsettings set --slot staging --settings PROJECT='src/rng/Numbers.Api/Numbers.Api.csproj' -g labs-appservice-cicd -n <dns-name>
Your deployment slots typically match source code branches, so when you push staging that would trigger the staging deployment.
- browse to the GitHub repository for your fork
- from the branches button create a new branch called
staging
Now add a deployment source so the staging slot will be deployed from the staging branch:
az webapp deployment source config -g labs-appservice-cicd --branch staging --slot staging -n <dns-name> --repo-url <github-fork-url>.git --git-token <github-token>
Sometimes the command seems to get stuck - if it doesn’t return within a few minutes, cancel it with Ctrl-C and then run the exact same command again.
Check in the Portal - under Deployment slots you can switch to the staging slot, which has its own URL.
When the deployment is complete, you can check you get a response from both slots:
# this is production:
curl https://<dns-name>.azurewebsites.net/rng

# and this is staging:
curl https://<dns-name>-staging.azurewebsites.net/rng
If you had a new version in the staging slot that you were ready to put live, you can swap the slots and then the staging slot becomes the production slot.
Lab
Update the app settings in the staging slot so the random number range is 50-500. Test your changes and if you’re happy then swap the slots so now production uses the new range.
Cleanup
Delete the RG to clean up:
az group delete -y -n labs-appservice
az group create -n labs-appservice-cicd --tags courselabs=azure
az appservice plan create -g labs-appservice-cicd -n app-plan-01 --is-linux --sku S1 --number-of-workers 2
Mine is https://github.com/sixeyed/azure - yours will contain your GitHub username
# create the app:
az webapp create -g labs-appservice-cicd --plan app-plan-01 --runtime dotnetcore:6.0 -n <dns-name>
# set the path we will be deploying from:
az webapp config appsettings set --settings PROJECT='src/rng/Numbers.Api/Numbers.Api.csproj' -g labs-appservice-cicd -n <dns-name>
We could have used webapp up and that would deploy from the code on the local machine; instead we’ve created the web app and set the path to the project in a config setting
# be sure to add the .git suffix to your repo URL:
az webapp deployment source config -g labs-appservice-cicd --manual-integration --branch main -n <dns-name> --repo-url <github-fork-url>.git
curl https://<app-fqdn>/rng
This deployment isn’t configured to fail so you can keep calling it to get new numbers.
git add src/rng/Numbers.Api/appsettings.json
git commit -m 'Change RNG range'
git push labs-appservice-cicd
curl https://<app-fqdn>/rng
workflow and admin:repo_hook permissionsYour token will be a random string prefixed with ghp_ - something like this: ghp_asd3YWHHefefgd2vZgege878AAH
az webapp deployment source delete -g labs-appservice-cicd -n <dns-name>
az webapp deployment source config -g labs-appservice-cicd --branch main -n <dns-name> --repo-url <github-fork-url>.git --git-token <github-token>
Sometimes the command seems to get stuck - if it doesn’t return within a few minutes, cancel it with Ctrl-C and then run the exact same command again.
staging and configure the deployment for that slot:az webapp deployment slot create --slot staging -g labs-appservice-cicd -n <dns-name>
az webapp config appsettings set --slot staging --settings PROJECT='src/rng/Numbers.Api/Numbers.Api.csproj' -g labs-appservice-cicd -n <dns-name>
staging that would trigger the staging deployment.stagingaz webapp deployment source config -g labs-appservice-cicd --branch staging --slot staging -n <dns-name> --repo-url <github-fork-url>.git --git-token <github-token>
Sometimes the command seems to get stuck - if it doesn’t return within a few minutes, cancel it with Ctrl-C and then run the exact same command again.
# this is production:
curl https://<dns-name>.azurewebsites.net/rng
# and this is staging:
curl https://<dns-name>-staging.azurewebsites.net/rng
az group delete -y -n labs-appservice