Azure Course Labs
Functions: RabbitMQ to Blob Storage
Azure functions have support for some services which are not native to Azure, for scenarios where applications have an infrastructure dependency which can’t be migrated to Azure. RabbitMQ is one example - it’s a very popular open-source message queue which can be used with functions even though there is no managed RabbitMQ service in Azure.
In this lab we’ll use the RabbitMQ trigger and run it locally with all the dependencies in containers, and then deploy to Azure with a marketplace VM image for RabbitMQ.
Reference
RabbitMQ function writing to Blob Storage
The scenario is an incoming stream of messages representing customer events, which we want to filter so we can store the most important. The code is in the RabbitToBlob directory:
- RabbitToBlob/PriorityMessageArchive.cs - receives an incoming message, checks the contents and copies complaint messages into blob storage
These attributes wire up the function:
[RabbitMQTrigger]listens on a RabbitMQ queue calledcustomerevents[Blob]is an output binding which will write a string to a blob
The RabbitMQ trigger is able to deserialize JSON into a .NET object, so the function starts with a CustomerEvent message and doesn’t need to do any formatting work.
For reference</summary>
Here’s how the function was created:
func init RabbitToBlob --dotnet

cd RabbitToBlob

dotnet add package Microsoft.Azure.WebJobs.Extensions.RabbitMQ --version 2.0.3

dotnet add package Microsoft.Azure.WebJobs.Extensions.Storage.Blobs --version 4.0.5

# there is no RabbitMQ template
</details>
Test the function locally
Start the Azure Storage emulator & RabbitMQ in Docker containers:
docker compose -f labs/functions/rabbitmq/docker-compose.yml up -d
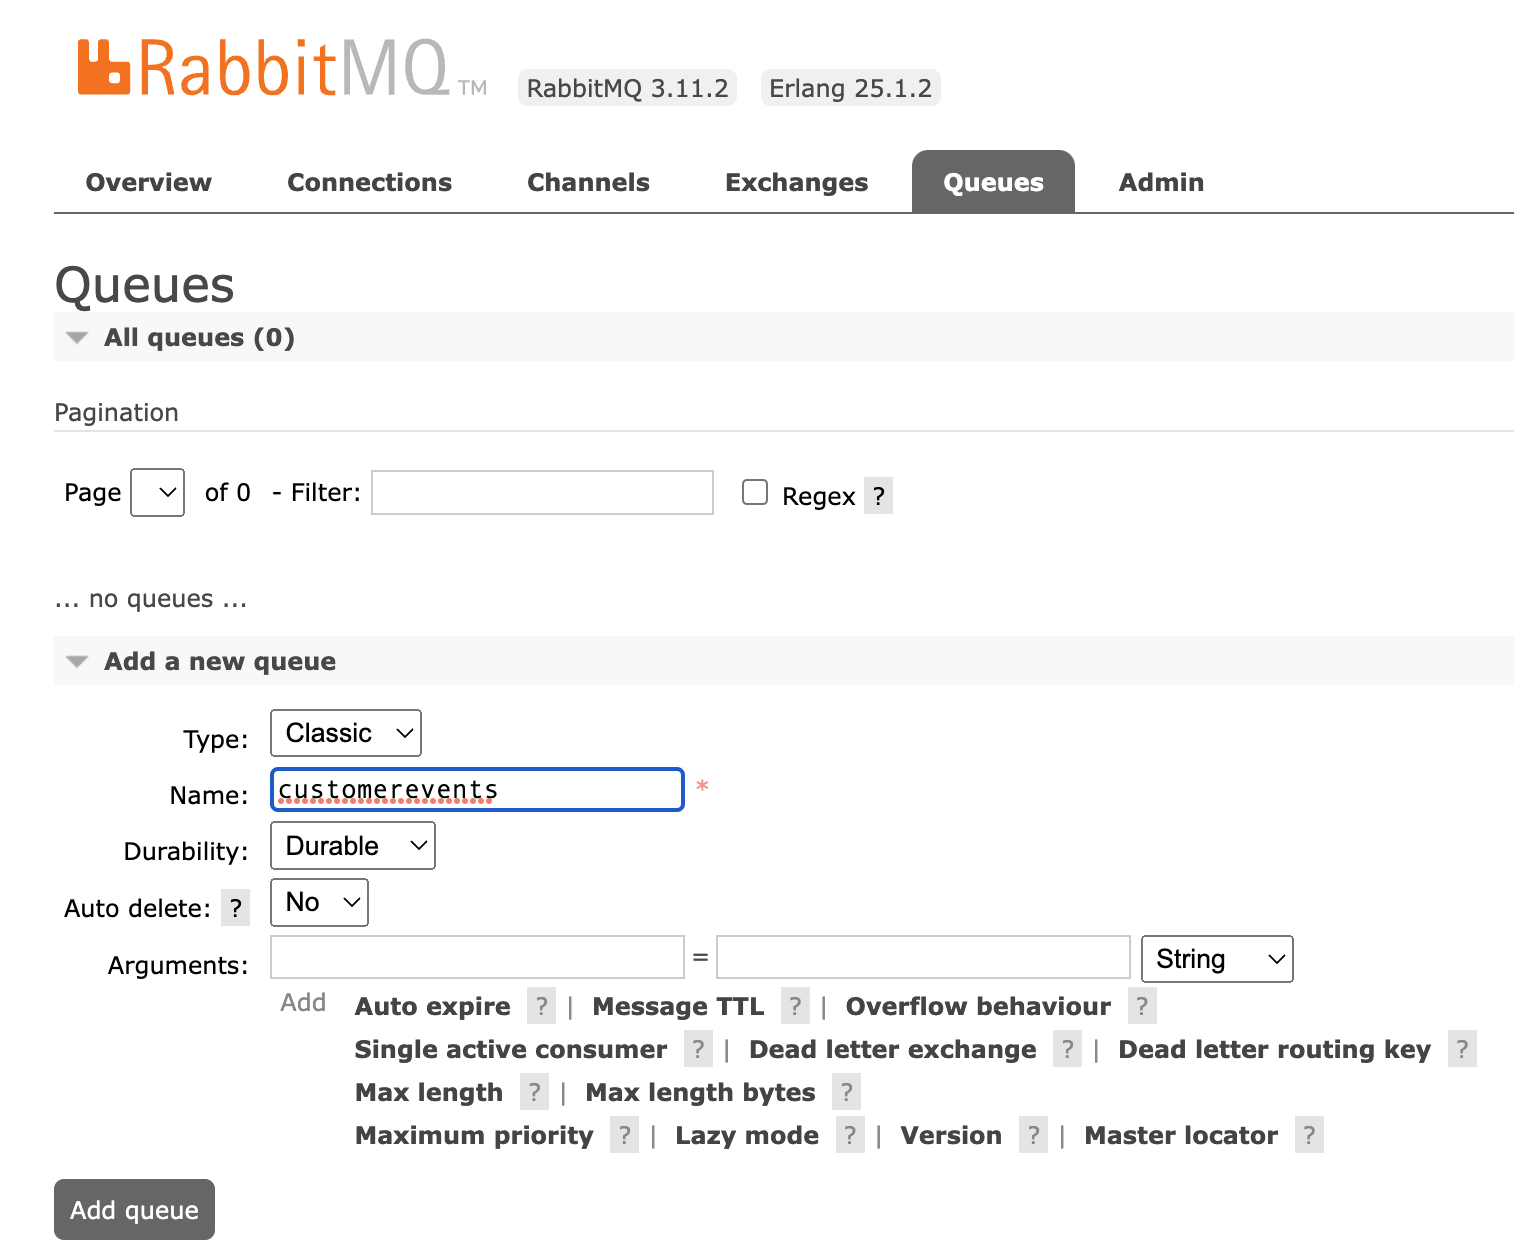
We’ll need to create the RabbitMQ queue the function will listen on
Open the RabbitMQ UI at http://localhost:15672 and sign in with:
- username
guest
- password
guest
Open the Queues tab, and under Add a new queue create a queue called customerevents:
Next create a file labs/functions/rabbitmq/RabbitToBlob/local.settings.json with these connection details:
{
    "IsEncrypted": false,
    "Values": {
        "AzureWebJobsStorage": "UseDevelopmentStorage=true",
        "FUNCTIONS_WORKER_RUNTIME": "dotnet",
        "CustomerOutputStorageConnectionString" : "UseDevelopmentStorage=true",
        "InputRabbitMQConnectionString" : "amqp://localhost:5672"
    }
}
Run the function and it will connect to RabbitMQ in the container:
cd labs/functions/rabbitmq/RabbitToBlob

func start
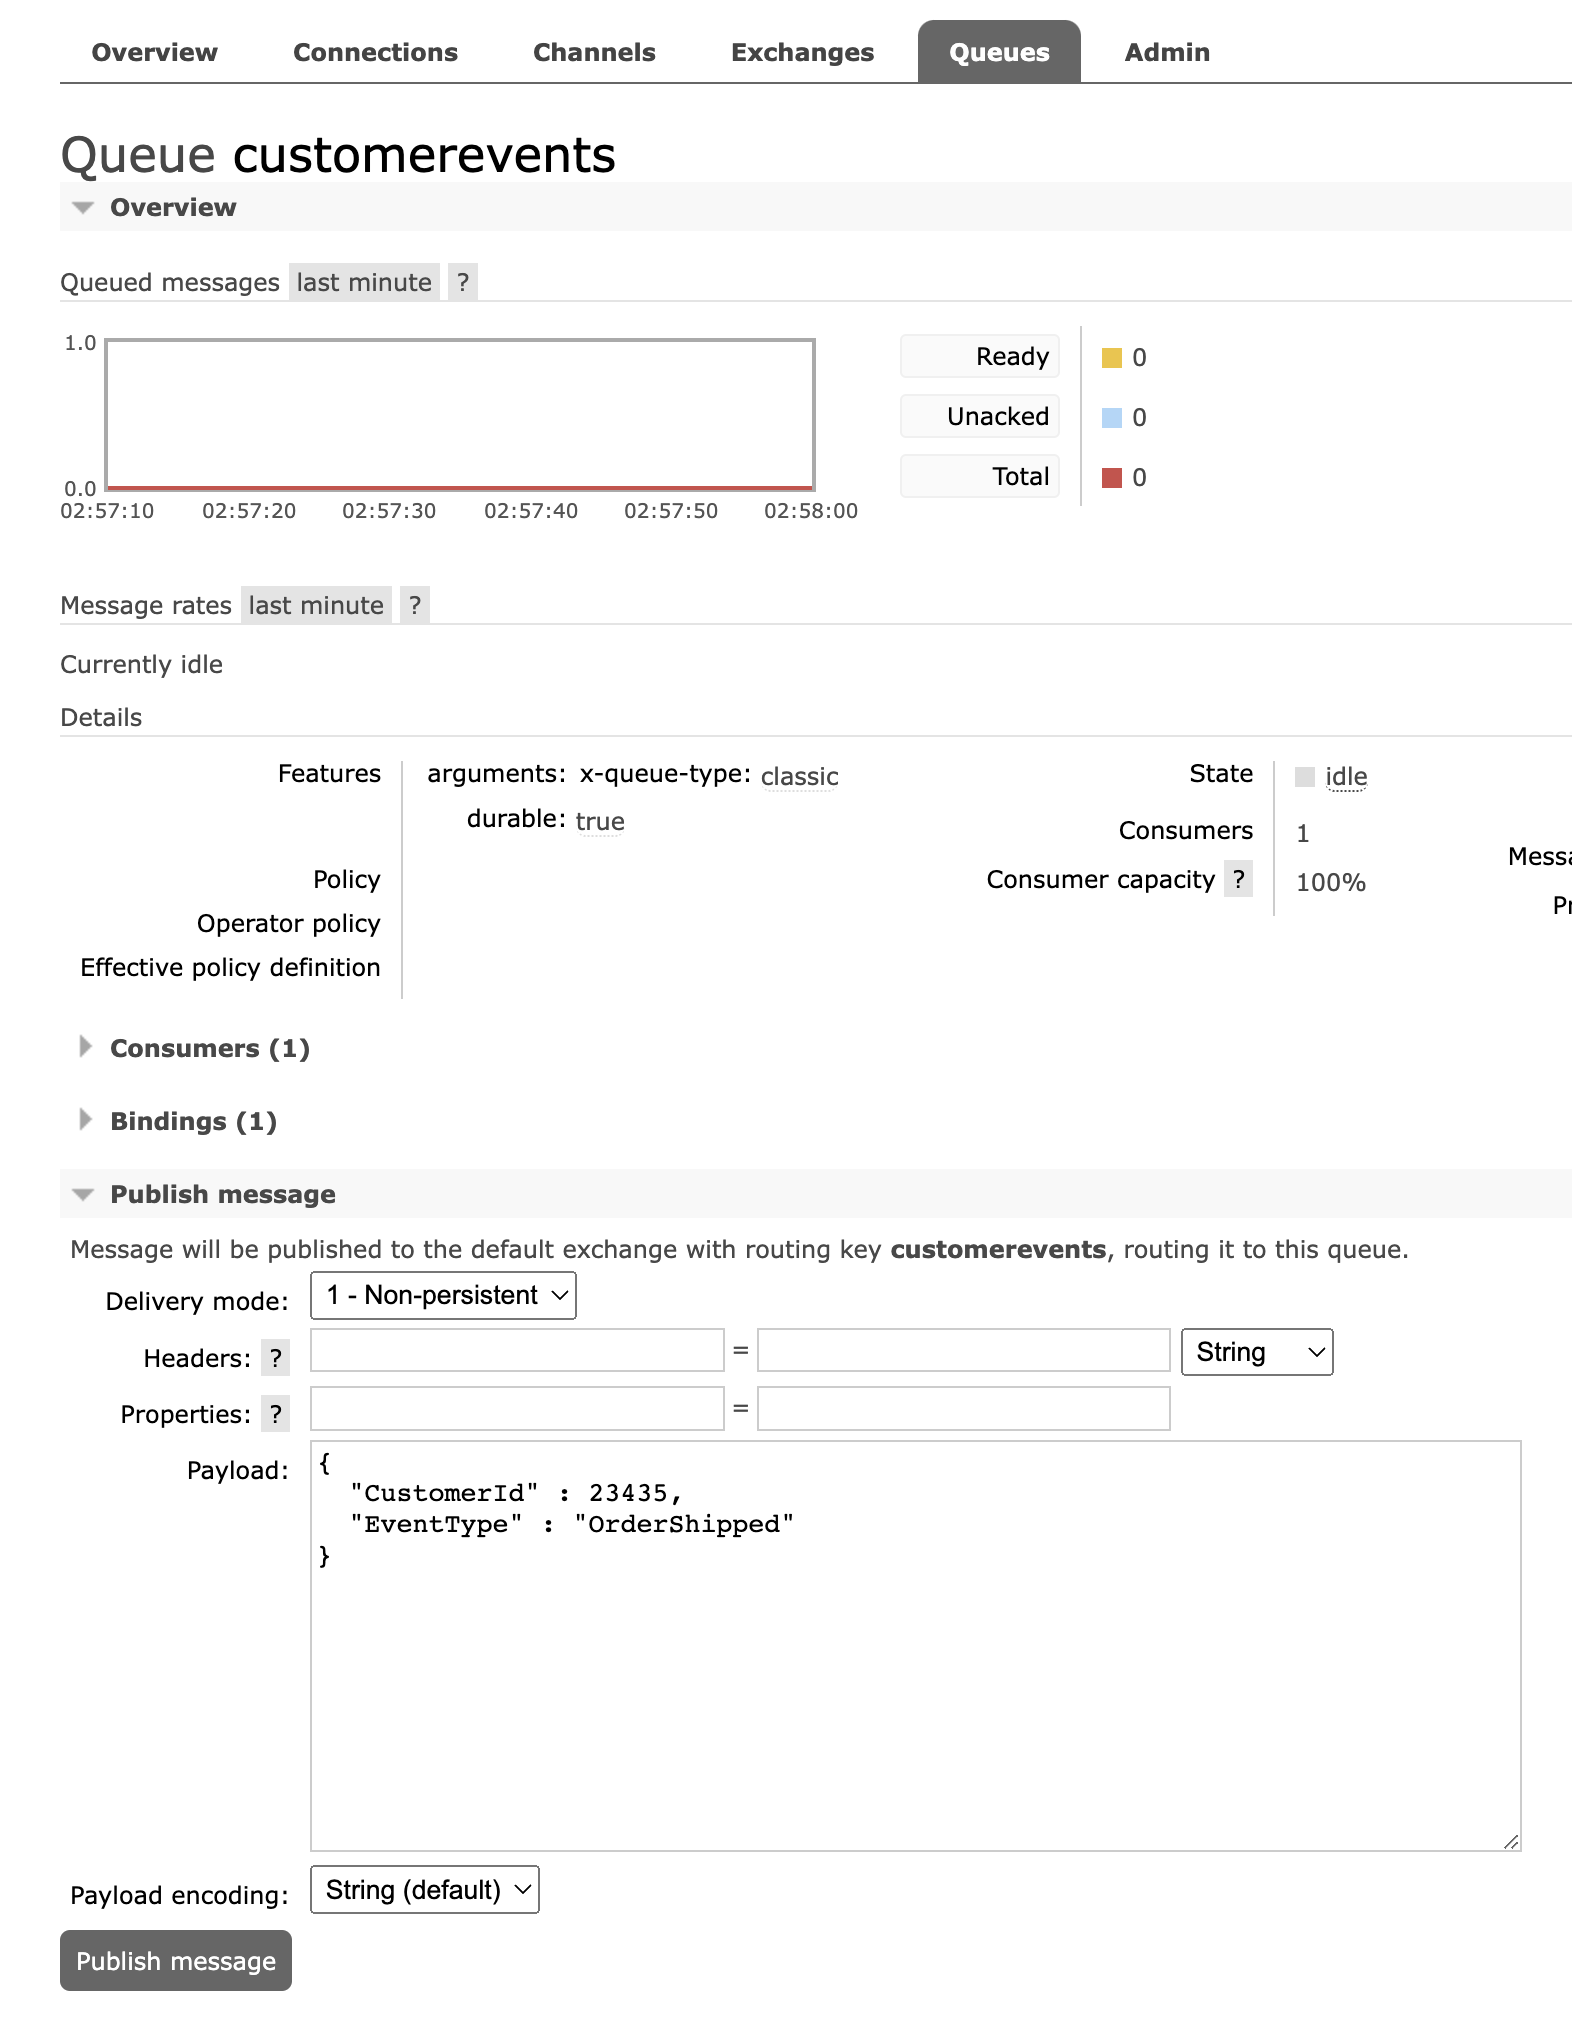
Open the customerevents queue in the Queues list in the RabbitMQ UI, and under Publish a message send some messages like these:
{
  "CustomerId" : 297844,
  "EventType" : "Order"
}
{
  "CustomerId" : 113435,
  "EventType" : "Complaint"
}
You should see output like this in the function - only Complaint messages will be archived:
[2022-11-08T02:58:32.148Z] Received customer message with event type: Complaint
[2022-11-08T02:58:32.166Z] Archiving complaint message for customer: 113435
[2022-11-08T02:58:32.291Z] Executed 'PriorityMessageArchive' (Succeeded, Id=44d45f7c-91b4-445d-9c6c-ea604fa0c614, Duration=145ms)
You can check in blob storage:
az storage blob list -c complaints -o table --connection-string "DefaultEndpointsProtocol=http;AccountName=devstoreaccount1;AccountKey=Eby8vdM02xNOcqFlqUwJPLlmEtlCDXJ1OUzFT50uSRZ6IFsuFq2UVErCz4I6tq/K1SZFPTOtr/KBHBeksoGMGw==;BlobEndpoint=http://127.0.0.1:10000/devstoreaccount1;"
And you should see a JSON blob for each complaint message.
Deploy to Azure
The initial setup in Azure is the usual:
az group create -n labs-functions-rabbitmq --tags courselabs=azure -l eastus

az storage account create -g labs-functions-rabbitmq --sku Standard_LRS -l eastus -n <sa-name>

az functionapp create -g labs-functions-rabbitmq  --runtime dotnet --functions-version 4 --consumption-plan-location eastus --storage-account <sa-name> -n <function-name>
The pre-reqs will take a bit more effort as there is no managed RabbitMQ service - you might want to use the Portal for that part:
-
create a resource and search for ‘rabbitmq bitnami’ - the VM option is the easiest, you can use the dev/test preset and then you’re in the normal VM create screen; use a password instead of SSH key
-
when it’s created you’ll need to set the NSG to allow access to port 15672 and 22 from your own IP address (for administration), and port 5672 from any address
-
follow these instructions to get the RabbitMQ username & password
-
open the RabbitMQ UI at your VM’s IP address, port 15672; follow same steps you did locally to create the queue customerevents
- the connection string for RabbitMQ is in the format
amqp://<user>:<password>@<ip-address>:5672
-
store that in an appsetting InputRabbitMQConnectionString
- you’ll also need a storage account for output
- set the connection string for the storage account in appsetting
CustomerOutputStorageConnectionString
When it’s all running, publish the function:
func azure functionapp publish <function-name>
Check back in the RabbitMQ UI under the Connections tab - you should see a connection which is the listener for the function trigger.
Publish some messages with different event types and confirm the complaints are archived to blob storage.
Lab
How could you automate the RabbitMQ VM setup?
Stuck? Try suggestions.
Cleanup
Stop the Azure Storage emulator and RabbitMQ containers:
docker compose -f ../docker-compose.yml down
Delete the lab RG:
az group delete -y --no-wait -n labs-functions-rabbitmq
func init RabbitToBlob --dotnet
cd RabbitToBlob
dotnet add package Microsoft.Azure.WebJobs.Extensions.RabbitMQ --version 2.0.3
dotnet add package Microsoft.Azure.WebJobs.Extensions.Storage.Blobs --version 4.0.5
# there is no RabbitMQ template
docker compose -f labs/functions/rabbitmq/docker-compose.yml up -d
We’ll need to create the RabbitMQ queue the function will listen on
guestguestcustomerevents:labs/functions/rabbitmq/RabbitToBlob/local.settings.json with these connection details:{
"IsEncrypted": false,
"Values": {
"AzureWebJobsStorage": "UseDevelopmentStorage=true",
"FUNCTIONS_WORKER_RUNTIME": "dotnet",
"CustomerOutputStorageConnectionString" : "UseDevelopmentStorage=true",
"InputRabbitMQConnectionString" : "amqp://localhost:5672"
}
}
cd labs/functions/rabbitmq/RabbitToBlob
func start
customerevents queue in the Queues list in the RabbitMQ UI, and under Publish a message send some messages like these:{
"CustomerId" : 297844,
"EventType" : "Order"
}
{
"CustomerId" : 113435,
"EventType" : "Complaint"
}
You should see output like this in the function - only Complaint messages will be archived:
[2022-11-08T02:58:32.148Z] Received customer message with event type: Complaint
[2022-11-08T02:58:32.166Z] Archiving complaint message for customer: 113435
[2022-11-08T02:58:32.291Z] Executed 'PriorityMessageArchive' (Succeeded, Id=44d45f7c-91b4-445d-9c6c-ea604fa0c614, Duration=145ms)
az storage blob list -c complaints -o table --connection-string "DefaultEndpointsProtocol=http;AccountName=devstoreaccount1;AccountKey=Eby8vdM02xNOcqFlqUwJPLlmEtlCDXJ1OUzFT50uSRZ6IFsuFq2UVErCz4I6tq/K1SZFPTOtr/KBHBeksoGMGw==;BlobEndpoint=http://127.0.0.1:10000/devstoreaccount1;"
az group create -n labs-functions-rabbitmq --tags courselabs=azure -l eastus
az storage account create -g labs-functions-rabbitmq --sku Standard_LRS -l eastus -n <sa-name>
az functionapp create -g labs-functions-rabbitmq --runtime dotnet --functions-version 4 --consumption-plan-location eastus --storage-account <sa-name> -n <function-name>
create a resource and search for ‘rabbitmq bitnami’ - the VM option is the easiest, you can use the dev/test preset and then you’re in the normal VM create screen; use a password instead of SSH key
when it’s created you’ll need to set the NSG to allow access to port 15672 and 22 from your own IP address (for administration), and port 5672 from any address
follow these instructions to get the RabbitMQ username & password
open the RabbitMQ UI at your VM’s IP address, port 15672; follow same steps you did locally to create the queue customerevents
amqp://<user>:<password>@<ip-address>:5672store that in an appsetting InputRabbitMQConnectionString
CustomerOutputStorageConnectionStringfunc azure functionapp publish <function-name>
Stuck? Try suggestions.
docker compose -f ../docker-compose.yml down
az group delete -y --no-wait -n labs-functions-rabbitmq